top of page


Call Duck Grow-Out Pens
These pens are 12' long x 4' wide
The interior height of the pen is 2'
These pens are used for young call ducklings while they develop and grow. They are my own design and you can modify or choose your own custom bells and whistles.
Wild species are not housed in these pens.
Materials List: (All lumber is pressure treated)
(2) 2x6x12
(1) 2x6x8
(5) xx4x8
(2) 2x4x12
(36) 2x2x8 (or so. We always end up using more than we bought and need a second trip to Lowes lol)
(4) Mortar mixing tubs (Lowes, Home depot etc)
(16) 2" hinges ( I found those on Amazon)
(8) Latches (I prefer butterfly latches)
(2) Greenleaf Valves (Tractor Supply)
PVC plumbing supplies for drains (this will depend on how you want to run the drain lines)
4 Red Kane Creep Feeders
2' and 4' black PVC coated hardware cloth 1/2" x 1/2"
(I buy it on amazon from Fencer Wire)
Roofing Tin for top
16' Cattle Panel (Tractor Supply)
Staples
3" wood screws
4x4 for center bracing

Step 1 (regardless of the length of your pen)
Cut a 2x4 in half (do this twice) These will be the legs of your pen.
Cut a 2x6x8 in half. These will become the bottom edge of your pen.
Mount the bottom piece about 2' from the top of the 2x4 leg.
Then cut a 2x4x8 in half. This will become the top edge of the outer wall and mount it at the top of your leg.
Make 2 of these. Mount a 2x4x12 to the top of your end pieces on both sides. It should stand (altho wobbly) by itself at this point.
NOTE: These pies are from old photos and show 2x4 and 2x2 not the sizes we are using for this project.


Now mount a 2x6x12 to the middle of the long sides at the same height as your end supports. It helps to work on a level surface and ensure your frame is square and level
TADA now you have a frame!
After this pen was put into place, we cut a 4x4 and used it to support the frame in the middle on both sides.

We placed 2x2s at the top of the frame at 4' intervals to staple hardware cloth and also tin to the roof.
Then he split the frame into 4 equal sections with 2x4s. This will create the basis for the 4 sections of the pen.
I changed my design a bit on the floor for this pen. One of THE most annoying things about these pens is that sometimes part of the floor wears out and you then need to replace the entire floor! So I decided to make each section of the pen modular so that it's easily removed to repair or replace flooring without doing the whole pen.
We installed scraps of 2x2s around the outer edges recessed down the width of a 2x2. We installed 2x4s with the wide end up also recessed to support the floor panels.

Now the individual sections were measured and a panel was built to fit inside of the frame and rest on the supports. The mortar tub was framed into this as well. These are made out of 2x2s You will need to make 4 of these.

The floor should look like this before you add hardware cloth. Each section is flush on the frame so no edges are sticking up.
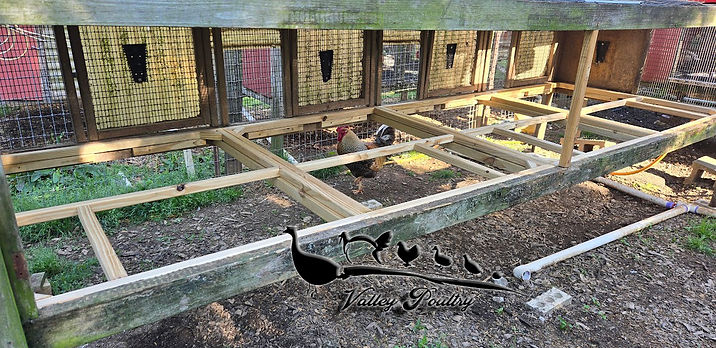
Now you can install hardware cloth over the frame and cut out the hole for the mortar tub.

You are probably wondering where the cattle panel comes in! Dividers that are removable! You are going to cut down the cattle panel so that it fits into the pen. (6 squares by 3 squares) Attach hardware cloth to it with hog rings or zip ties. We find bolt cutters will go through them pretty well.

While you are framing the sides, leave a small gap inbetween the 2x2s that the ends of the cattle panel will slide into. You want it to stick out just a little so you can pull on it.

We like to leave a little hand hold cut out on the edge of the panel so I can slide it easier. They are a bit sticky but you can wiggle them into place. This allows your pen to be used for 1-4 different sections!

Install your mortar tubs and drill the hole for the plumbing if this is what you are doing. Ours runs from each pen all the way to the bottom of the yard so that when I drain it, there is no flooding under the pens.
This is where my tutorial gets hazy. Depending on what you want to do with the sides (we like doors on front AND back) you will need to cut 2x2s for the frame for your doors. 2' hardware cloth will be used to cover the sides.

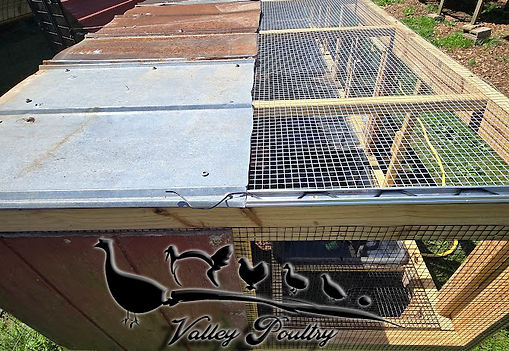
Everyone has different preferences on roofing. Some like the entire pen covered with tin. I prefer half and half so that when it rains there is rainwater going into the pools. (The ducks seem to love this). During the hottest part of the summer I cover the exposed area with shade cloth. This allows rainwater to still go into the pools
But I do insist on the entire top of the pen to be covered in hardware cloth even if the roof is covered with tin. I have found out the hard way that rodents CAN slide under the ridges of the tin and access the pen. This totally prevents that.
I have used the red Kane piglet feeders for years. They work wonderfully BUT they don't have a top. So they must be covered. With a few exceptions, we only have to refill them once a week. They don't manage to climb into them or fill them up with "crap" (literally lol) and the food stays much cleaner!
Now you can add feeders and ducklings and enjoy your pens!
Warning. This may not be a weekend project for most. These are time consuming to build--especially the first one. So don't get frustrated if you can't bust one out quickly.
Each divider can be removed so that it can be 4 pens or one huge one!

bottom of page